

Oh, honey, let me tell you about this bread! My first trip to Italy, I swear I ate my weight in bread. Every meal, every snack, this incredible, rustic loaf. I came home obsessed, determined to recreate that magic. After a few, ahem, 'dense brick' attempts, I finally cracked the code. This Crusty Italian Bread recipe? It’s pure love, baked right in your kitchen.
One time, I was so excited, I totally forgot the salt! The dough looked great, rose beautifully, but when I took a bite? Blegh. Tasted like... well, like nothing. Just bland flour. Oops! My family still teases me about my 'ghost bread.' Lesson learned: salt is NOT optional, especially for a good Crusty Italian Bread!
Gathering Your Ingredients for the Perfect Crusty Italian Bread
- 3 cups all-purpose flour: This is our workhorse, the foundation of our beautiful loaf. I always go for unbleached all-purpose, it just feels a little more natural, you know? It provides a lovely structure without being too heavy. Think of it as the canvas for all the other amazing flavors and textures we're building into our Crusty Italian Bread. It's forgiving, too, which is great for us home bakers!
- 1 cup bread flour: Now, this is where the magic happens for that chew! Bread flour has a higher protein content, meaning more gluten. More gluten equals more elasticity, which gives your bread that satisfying, pull-apart texture. It's the secret weapon for preventing a crumbly loaf and getting that perfect, rustic Italian feel. Don't skip it, it makes a huge difference.
- 1/4 cup fine semolina flour: Oh, semolina! This is my little secret ingredient for that authentic touch. It adds a subtle golden hue, a slightly coarser texture, and a fantastic crispness to the crust. It’s what gives our Crusty Italian Bread that extra special something, making it feel straight out of a Roman bakery. Plus, it just smells so good when you mix it in, a little nutty!
- 1 1/2 cups warm water (105-115°F): Water temperature is SO important, hon. Too cold, and your yeast will be sluggish, too hot, and you'll kill it, literally. I keep a thermometer handy, aiming for bathwater warm. This perfect temperature wakes up our yeast, getting it ready to do its job and make our dough light and airy. It's the lifeblood of our loaf, really.
- 2 1/4 teaspoons instant dry yeast: This tiny powerhouse is responsible for all the glorious bubbles and the incredible rise in our bread. Instant dry yeast is my go-to because you don't even have to proof it first, just mix it right in! It's so reliable, and honestly, seeing the dough puff up thanks to these little guys is just pure joy. It's the heart of the bread's texture.
- 2 tablespoons extra virgin olive oil (for the dough): A little bit of good quality extra virgin olive oil in the dough adds such a lovely richness and a subtle flavor that just screams 'Italian.' It also helps keep the crumb tender and moist, which is a beautiful contrast to that super crispy crust we're aiming for. It’s a small addition that makes a big impact on the overall taste of this amazing bread.
Baking Bliss: How to Make Your Own Crusty Italian Bread
- Step 1: Activate the Yeast:
- Okay, first things first! Grab that warm water remember, not too hot, not too cold and sprinkle in your yeast and sugar. Give it a gentle whisk and let it sit for about 5-10 minutes. You're looking for a foamy, bubbly top, like a tiny beer head. If you don't see that, oops, your yeast might be dead! Time to start over, because active yeast is key for a beautifully risen Crusty Italian Bread. This step always feels like a little science experiment, and I love watching it come alive!
- Step 2: Combine Dry Ingredients:
- While your yeast is doing its thing, grab a big bowl and whisk together all your flours the all-purpose, bread, and semolina along with the salt. Whisk it really well, like you're trying to incorporate air, because we want everything evenly distributed. You don't want a pocket of just salt or semolina, trust me! This dry mix lays the foundation for the structure and flavor of our gorgeous Crusty Italian Bread, so make sure it's all happy together.
- Step 3: Mix the Dough:
- Now for the fun part! Pour that foamy yeast mixture and the olive oil into your dry ingredients. I start with a sturdy spoon or a Danish dough whisk, bringing it all together until it forms a shaggy, sticky ball. Don't be afraid to get in there with your hands if you want to feel it it's supposed to be a bit messy! This initial mix is where the ingredients start to become 'dough,' ready to transform into the best Crusty Italian Bread.
- Step 4: Knead and First Rise:
- Time to knead! Turn that shaggy dough out onto a lightly floured surface. Knead it for about 8-10 minutes, until it's smooth and elastic. It's a workout, but so rewarding! Then, pop it into a lightly oiled bowl, give it a flip so it's coated, cover it, and let it rise in a warm spot until it's doubled in size usually 1-1.5 hours. This first rise is crucial for developing flavor and that airy texture in your future Crusty Italian Bread. Patience, my friend, patience!
- Step 5: Shape and Second Rise:
- Once it's doubled, gently punch down the dough to release the air. Turn it out and shape it into your desired loaf. I usually go for an oval or a round boule. Be gentle, you want to keep as much of that lovely air as possible! Place it on parchment paper on a baking sheet, cover it loosely, and let it rise again for another 30-45 minutes. This second rise gives our Crusty Italian Bread its final beautiful form and ensures a light crumb.
- Step 6: Score and Bake:
- Preheat your oven with a baking stone or sheet inside, and get ready for the grand finale! Just before baking, use a super sharp knife or a bread lame to score the top of your loaf. This isn't just for looks, it helps control where the bread expands, preventing it from bursting. Mist with water, or add a tray of water for steam. Bake until golden brown and hollow-sounding when tapped. That crackling sound as it cools? Pure music for a perfect Crusty Italian Bread!
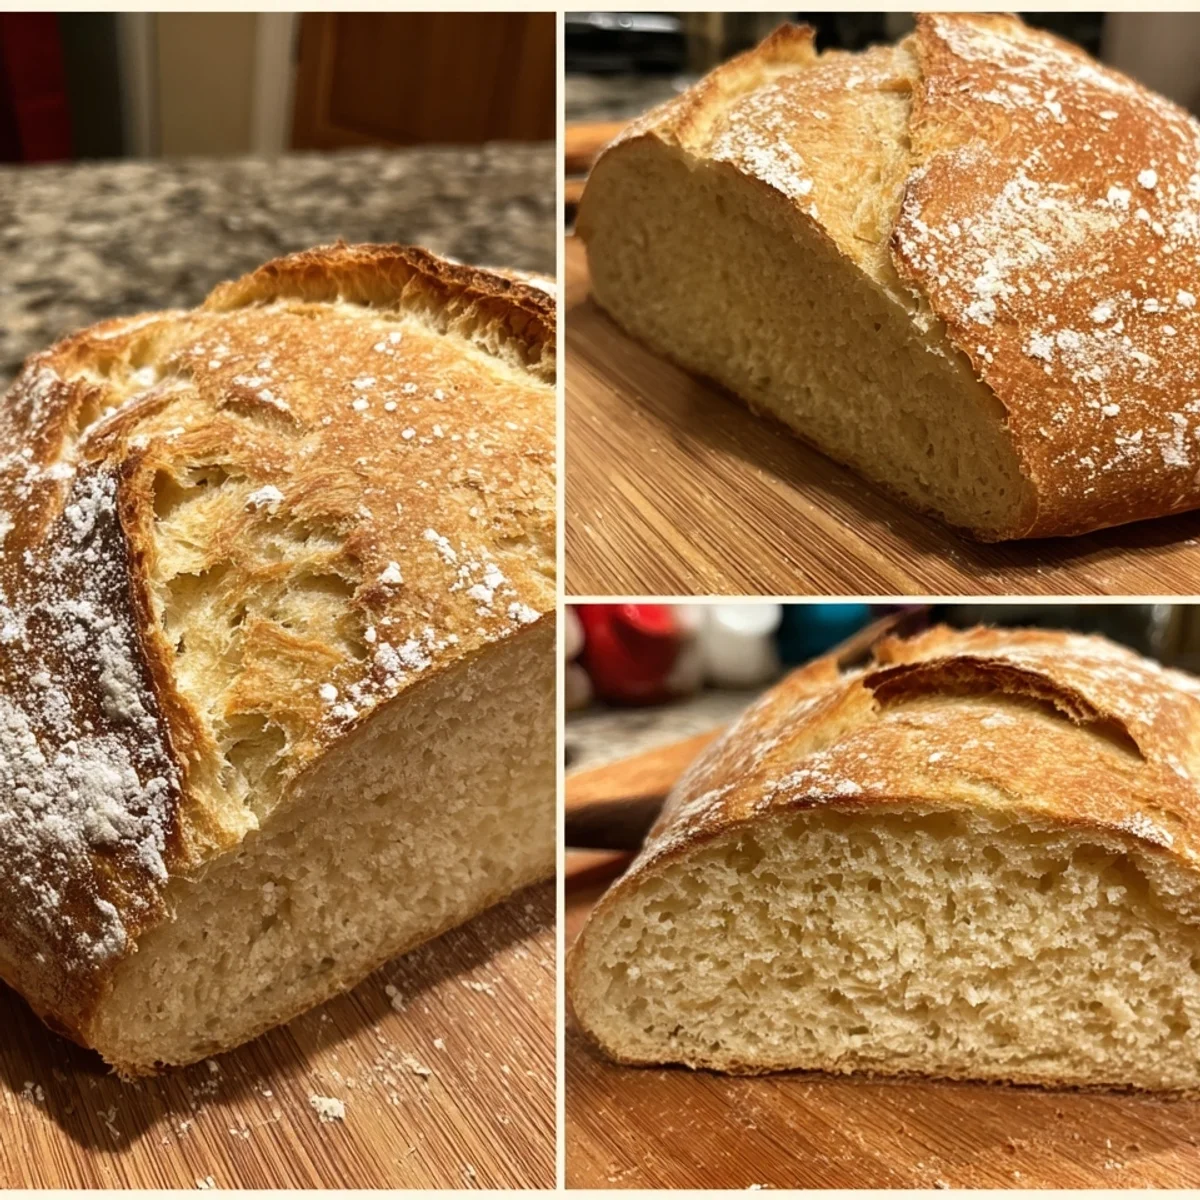
Oh, baking this bread is such a sensory journey. The warmth of the dough in my hands, the earthy smell of the flour, that incredible yeasty aroma as it rises. And then, the moment of truth: pulling that golden, fragrant loaf from the oven. The crackle of the crust as it cools, the steam escaping when you slice it open. It’s pure joy, every single time. Honestly, it feels like a little piece of Italy right here at home.
Keeping Your Crusty Italian Bread Fresh: Storage Secrets
So, you've got this glorious Crusty Italian Bread, now what? My biggest mistake was wrapping it tightly in plastic while it was still warm hello, soggy crust! Always let it cool completely first. For same-day eating, just leave it on the counter, cut-side down. For longer, wrap it loosely in a clean kitchen towel, then pop it in a paper bag. It'll last a couple of days that way. If you want to keep it longer, slice it up and freeze it in an airtight bag. Just toast from frozen, and it's almost like fresh again! Trust me, no one wants hard-as-a-rock bread.

Swapping It Out: Ingredient Ideas for Crusty Italian Bread
I've played around with substitutions a bit, honestly, mostly out of necessity! If you don't have semolina, you can totally use all-purpose flour for that quarter cup it just won't have quite the same golden color or subtle texture, but it'll still be a fantastic loaf. For the olive oil, any good quality olive oil will work, not just extra virgin. I've even swapped a tiny bit of honey for the sugar when I was out, and it gave a slightly richer flavor. Don't be afraid to experiment a little, but for that authentic Crusty Italian Bread feel, stick to the recipe if you can!
What to Serve with Your Amazing Crusty Italian Bread
Okay, so you've got this beautiful Crusty Italian Bread. What do you do with it?! My favorite? Just a generous drizzle of good quality extra virgin olive oil and a sprinkle of flaky sea salt. Heaven! It's also amazing alongside a hearty minestrone or any rich stew. Think bruschetta with fresh tomatoes and basil, or garlic bread for pasta night. Honestly, it makes the best sandwiches, too especially with some fresh mozzarella and roasted red peppers. Or, for a simple treat, slather it with butter and jam for breakfast. The possibilities are endless, my friend!
The Heart of Italy: A Look at Crusty Italian Bread's Roots
When I think of Crusty Italian Bread, I think of generations of nonnas in sun-drenched kitchens, kneading dough with love. Italian bread isn't just food, it's a staple, a symbol of community, meant to be shared. Every region has its own version, from the salt-free Tuscan pane to the rustic loaves of the south. This particular recipe really captures that simple, wholesome essence just a few basic ingredients transformed into something extraordinary. It's about honoring tradition while bringing that incredible flavor and texture right into our modern kitchens. It’s a connection to history, baked in every loaf.
And there you have it, my friend! Your very own, incredibly satisfying Crusty Italian Bread. There’s nothing quite like the smell and taste of a homemade loaf, fresh from the oven. It’s a little piece of Italy, made with your own hands. I hope you love baking and sharing this as much as I do. Please, please, let me know how your loaf turns out in the comments below! Happy baking!

Your Burning Questions About Crusty Italian Bread, Answered!
- → Can I use active dry yeast instead of instant?
Yes, you totally can! Just remember to proof it first. Combine it with the warm water and sugar, let it sit for 5-10 minutes until foamy, then proceed with the recipe. It works just as well for this Crusty Italian Bread, it just needs that extra step to get going.
- → Why isn't my bread crusty?
Ah, the crust struggle! The biggest culprits are usually not enough heat or a lack of steam. Make sure your oven is fully preheated, and try adding a pan of hot water to the bottom of your oven during the first part of baking. That steam is key for developing that beautiful, hard Crusty Italian Bread exterior.
- → Can I make this dough ahead of time?
You bet! After the first rise, you can punch it down, put it in an oiled bowl, cover it tightly, and pop it in the fridge overnight or for up to 24 hours. Just let it come to room temperature for about an hour before shaping and continuing with the second rise. It's a great way to spread out the work for your Crusty Italian Bread!
- → What if my dough doesn't rise?
Oh, that's a bummer, I've been there! It's usually due to inactive yeast (too old, or water too hot/cold). Double-check your yeast's expiration and water temp next time. Also, ensure your rising spot is warm enough. Sometimes, dough just needs a little more time, especially in a cooler kitchen, so give it a chance before giving up on your Crusty Italian Bread dream!
- → Can I add herbs to this Crusty Italian Bread recipe?
Absolutely, that's a fantastic idea! I love adding a tablespoon or two of dried rosemary or oregano to the dry ingredients for an extra aromatic kick. You could also mix in some chopped fresh garlic or sun-dried tomatoes during the kneading stage. It adds a wonderful twist to this classic Crusty Italian Bread.