

I remember the first time I tried to recreate that Texas Roadhouse magic at home. My husband, bless his heart, is obsessed with their garlic butter chicken. I swear, he talks about it in his sleep! So, one rainy Tuesday, armed with a vague memory and a lot of hope, I set out to make my own version. It wasn't pretty at first, honestly. There was a moment I almost set off the smoke detector because I cranked the heat too high. Oops! But after a few attempts, a little less smoke, and a lot more tasting, I finally cracked the code to this incredibly flavorful, juicy chicken. This Homestyle garlic butter Chicken Skillet isn't just a meal, it's a hug in a pan, bringing those restaurant vibes right into your kitchen.
Oh, the kitchen chaos! One time, I was trying to get this skillet ready in a hurry, and I completely forgot to pat the chicken dry. You know what happens then, right? Steamed chicken, not seared! It was still edible, but lacked that gorgeous crust. My dog got an extra treat that night. Learn from my mistakes, friends, a little paper towel goes a long way for a proper garlic Butter Chicken Skillet.
Ingredients for Your Garlic Butter Chicken Skillet
- Boneless, Skinless Chicken Breasts: I usually go for boneless, skinless because, let's be real, who has time for bones on a Tuesday? They cook up quick and soak up all that buttery goodness. If you're feeling fancy, thighs work too, but adjust cooking time.
- Unsalted Butter: This is the heart of our dish, folks. Don't even think about margarine, please. Butter brings that richness, that silky texture. Unsalted lets us control the seasoning.
- Olive Oil: Just a touch for searing the chicken to get that beautiful golden crust. I sometimes forget it and just use butter, which works, but olive oil has a higher smoke point.
- Garlic: And I mean lots of garlic. Freshly minced, always. I once tried garlic powder in a pinch, and it just wasn't the same. It needs that pungent, aromatic kick. More is more here, honestly.
- Chicken Broth: Just a splash to deglaze the pan and build a little sauce. Low sodium is my pick, so I can season as I like. Water works, but broth adds another layer of flavor.
- Heavy Cream: Don't skimp on this! It makes the sauce unbelievably velvety and luxurious. I tried half-and-half once, thinking I was being "healthier," and the sauce was just... thin. Never again!
- Fresh Parsley: For that pop of color and fresh, herbaceous lift. It really brightens up the rich flavors of this chicken dish. Dried parsley is okay, but fresh looks and tastes so much better.
- Lemon Juice: A squeeze at the end is a game-changer. It cuts through the richness and adds a touch of brightness. It's like a secret weapon for balancing flavors.
- Salt & Black Pepper: Simple, essential. Season your chicken well at every stage. I've definitely under-seasoned before and had a bland dish, so taste as you go!
How to Create This Garlic Butter Chicken Skillet
- Prep the Chicken Right:
- First, grab those chicken breasts and pat them super dry with paper towels. This is crucial for getting that beautiful sear, remember my steamy chicken incident? Slice them horizontally into thinner cutlets, about 1/2-inch thick. Season generously with salt and pepper on both sides. This ensures every bite of our chicken is flavorful, not just the outside.
- Sear for Sizzle:
- Heat a large, heavy-bottomed skillet (cast iron is my fave!) over medium-high heat. Add the olive oil and 1 tablespoon of butter. Once shimmering, add the chicken in a single layer, making sure not to overcrowd the pan. You want a gorgeous golden-brown crust, about 3-4 minutes per side. Cook in batches if you need to, then set the chicken aside on a plate. This step builds so much flavor!
- Build the Butter Sauce Magic:
- Reduce the heat to medium. Add the remaining butter to the skillet. Once melted, toss in that glorious minced garlic. Sauté for about 1 minute until fragrant. Don't let it burn, hon, or it'll get bitter! Pour in the chicken broth and scrape up any browned bits from the bottom of the pan that's pure flavor gold for your sauce.
- creamy Dream Time:
- Stir in the heavy cream and bring the sauce to a gentle simmer. Let it cook for 2-3 minutes, allowing it to thicken slightly. The aroma at this point? Oh my goodness. It's rich, garlicky, and absolutely divine. This is where the magic happens, transforming simple ingredients into something truly special.
- Return and Finish:
- Nestle the seared chicken back into the skillet, spooning that incredible garlic butter sauce over each piece. Let it simmer gently for another 2-3 minutes, just enough for the chicken to warm through and soak up all that creamy goodness. Make sure everything is coated. This helps the chicken stay juicy and ensures every bite is drenched in flavor.
- Brighten and Serve:
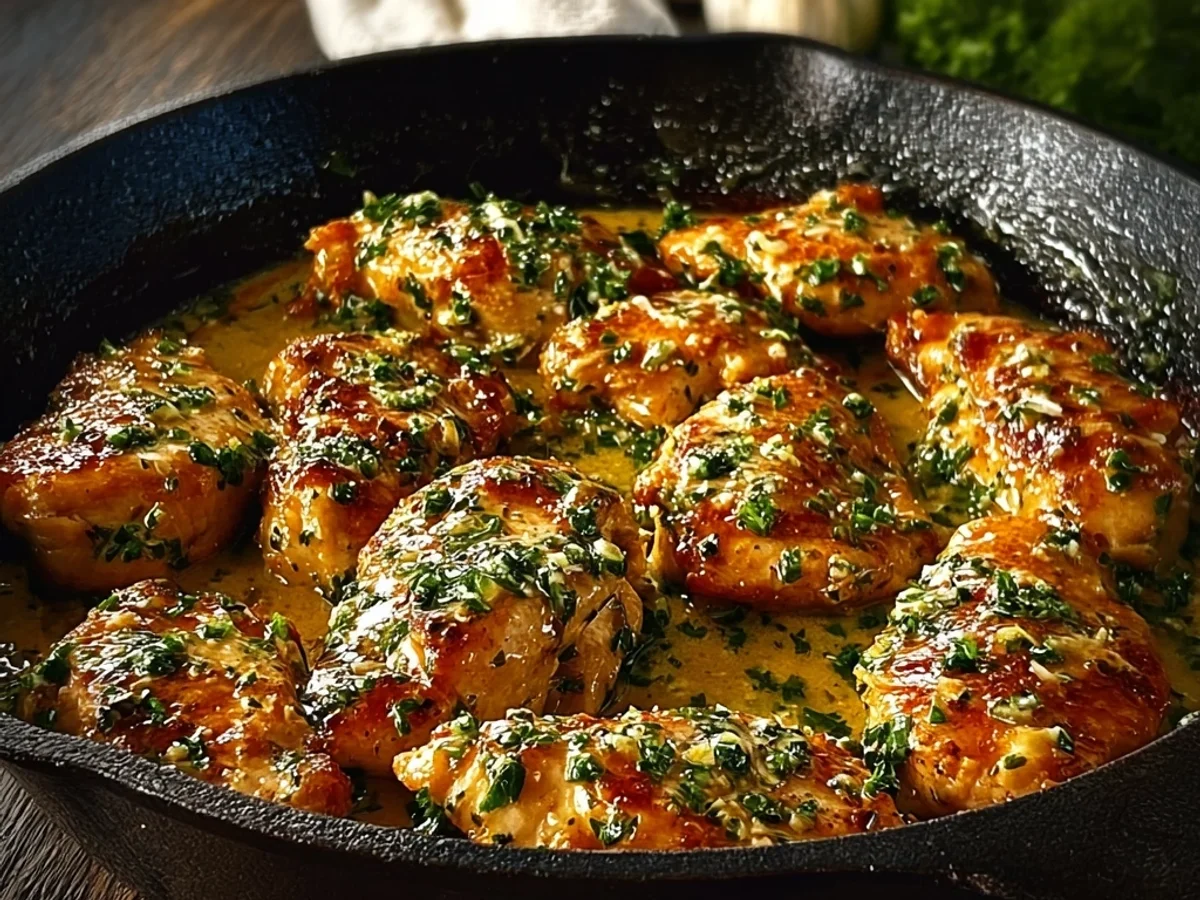
- Remove the skillet from the heat. Stir in a squeeze of fresh lemon juice and sprinkle generously with fresh parsley. Give it a taste does it need a little more salt or pepper? Maybe a tiny bit more lemon? Adjust to your liking! Serve your Homestyle Garlic Butter Chicken Skillet immediately with your favorite sides. It looks so impressive, but it was just a little kitchen dance, right?
There’s something so satisfying about seeing this dish come together in one skillet. It feels like a little victory, especially on a hectic weeknight. I remember one time, my little one wandered into the kitchen, drawn by the smell, and just stood there, mesmerized. That's the kind of moment that makes all the kitchen messes worth it. This Homestyle Garlic Butter Chicken Skillet truly brings everyone to the table.
Storing Your Garlic Butter Chicken Skillet
Storing leftovers can be a bit tricky with creamy sauces, but I've got you. Let this chicken skillet cool completely before transferring it to an airtight container. Honestly, I once put warm leftovers straight into the fridge and the condensation made the sauce a little watery. Not a disaster, but not ideal! It keeps well in the refrigerator for up to 3-4 days. When reheating, I prefer to do it gently on the stovetop over low heat, adding a splash of chicken broth or cream if the sauce seems too thick. Microwaving works in a pinch, but sometimes the cream can separate a little, which isn't the prettiest, but still tastes fine. Don't freeze this one, the cream sauce tends to break down when thawed, leaving you with a less-than-ideal texture.

Ingredient Substitutions
Okay, so you're out of something? Been there! For the chicken, boneless, skinless thighs are a fantastic swap for breasts. They stay incredibly juicy, though they might need a few extra minutes to cook. If you're out of heavy cream, I've tried using full-fat coconut milk (the canned kind, not the carton!) once, and it gave the sauce a surprisingly delicious, slightly tropical twist totally unexpected, but it worked! For the broth, white wine can be used for half of the liquid for an extra layer of flavor. And if fresh parsley is nowhere to be found, a sprinkle of dried Italian seasoning can add a similar herbaceous note, though it won't have that vibrant fresh pop. Just remember, these are "kinda" worked situations, so adjust to your taste for this hearty chicken dish.
Serving Suggestions
This Homestyle Garlic Butter Chicken Skillet is so versatile! For me, a big pile of creamy mashed potatoes is non-negotiable. They soak up all that incredible garlic butter sauce like a dream. Steamed green beans or a simple side salad with a zesty vinaigrette are perfect for adding a bit of freshness and color. If you're feeling a bit indulgent, some crusty bread for dipping is a must seriously, don't skip the bread! For drinks, a crisp white wine like a Sauvignon Blanc or even just a tall glass of iced tea complements the richness beautifully. And for a full-on cozy night in, this dish paired with a good book or a cheesy rom-com? Yes, please!
Cultural Backstory
While this specific Homestyle Garlic Butter Chicken Skillet isn't steeped in ancient culinary history, its inspiration, the Texas Roadhouse version, definitely taps into that comforting American steakhouse tradition. It's about big, bold flavors, generous portions, and food that just feels good. For me, it connects to family dinners and celebrating small wins. My dad always loved those kinds of hearty, flavorful meals, and recreating something similar at home feels like a little nod to those cherished memories. It's the kind of dish that makes you feel taken care of, a modern classic in our own kitchen, born from a craving for that restaurant taste but made with all the love of home cooking.
And there you have it, friends! Your very own Homestyle Garlic Butter Chicken Skillet, ready to make your taste buds sing. It might have started with a little kitchen mishap and a lot of trial and error, but that's the beauty of home cooking, right? It's about the journey, the smells, and the joy it brings. I hope this dish becomes a favorite in your home, just like it is in mine. Don't forget to share your versions with me!

Frequently Asked Questions About This Garlic Butter Chicken Skillet
- → Can I use chicken thighs for this recipe?
Absolutely! Chicken thighs are fantastic here. They tend to stay even juicier than breasts. Just be sure to adjust your cooking time, as thighs might need a few extra minutes to cook through completely. I've used them many times, and they're delicious!
- → What if I don't have fresh garlic?
Fresh garlic is definitely preferred for that authentic punch, but in a pinch, you can use garlic powder. I'd suggest starting with 1 teaspoon of garlic powder for every 3 cloves of fresh garlic and adjusting to taste. It won't be quite the same, but it'll work!
- → My sauce for the Garlic Butter Chicken Skillet is too thin. What happened?
Oops! This can happen if the cream didn't simmer long enough or if your heat was too low. Try letting it simmer a bit longer on medium-low heat, stirring occasionally, until it thickens to your liking. Sometimes I've added a tiny cornstarch slurry (1 tsp cornstarch mixed with 1 tsp cold water) to help it along.
- → How long does this dish last in the fridge?
Your delicious leftovers will keep well in an airtight container in the refrigerator for about 3-4 days. Just make sure it cools down completely before storing. I usually portion it out for quick lunches throughout the week, and it holds up pretty well!
- → Can I add vegetables to this recipe?
Yes, please! I love tossing in some fresh spinach or chopped asparagus during the last few minutes of cooking. Mushrooms would also be amazing. It's a great way to sneak in some extra greens and make it a true one-pan meal, which is always a win in my book!